The use of BIM content enables architects, engineers, builders, and also manufacturers to save time and increase productivity in their various construction projects. However, in order to do so, one must ensure that the objects used in the various projects are of high quality. With a view to optimising them, we have prepared a few recommendations, just for you. Enjoy reading!
- The importance of classifying your object typologies
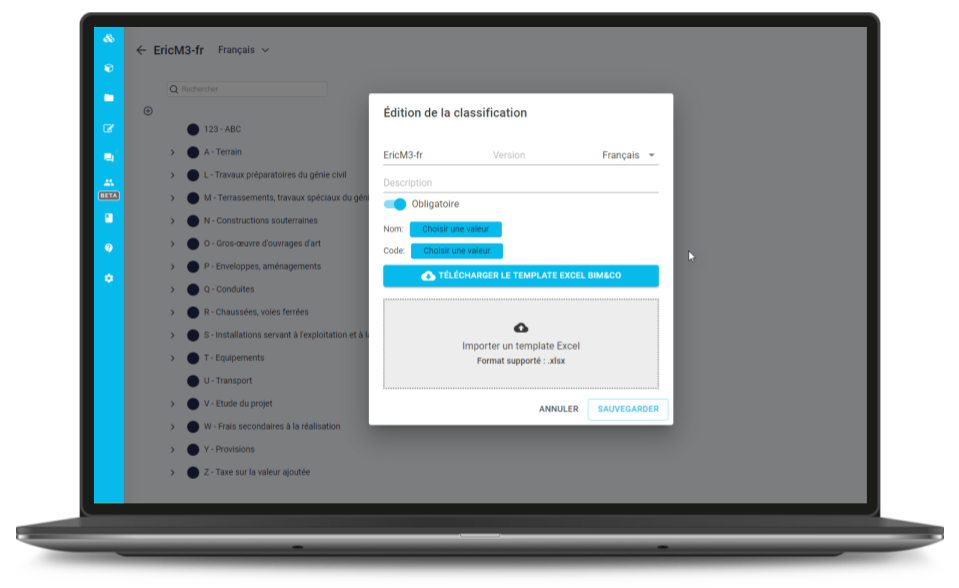
Once your BIM objects have been modelled, their classification system is very important as it allows you to categorise all of the content and swiftly filter it during searches.
In addition to what are referred to as standard classifications, one particular feature of the Onfly platform is that it allows you to create your own classifications. Discover how to here! Following their creation, you must create a hierarchical structure for them, which will allow you to reference all of the objects on your platform. The classes are organised depending on their hierarchical level and their code.
- 2D view in addition to 3D modelling?
In order to construct a building, 2D plans are used as a basis. This view is important in the creation of BIM objects, especially with the definition of the construction lines, which will allow you to know more regarding the various levels of detail. While, at the start of a BIM project, details may not be essential, they become more and more so as the project progresses and becomes more specific. In actual fact, the integration of 2D symbols facilitates the reading of plans, which is still essential in construction projects – for people present on-site who require specific views, for example. Therefore, we recommend using a certain level of detail for the 2D part of each object. You can find out more about the various levels of detail by watching our most recent webinar, here.
However, nowadays software applications that enable the creation of these plans, such as AutoCAD, do now allow you to establish a link between these two plans. This is the case, for example, when designing the elevation of the building, where these two views, “deliverable” and “plan”, are completely separate. In the 2D view, it becomes more difficult to envisage yourself within the project.
So, although the 2D view is important, we recommend the use of 3D modelling in order to optimise your BIM objects. The benefit of producing a model in this view – of modelling the building in 3D – is that it enables all the other views within the project to be extracted from the 3D model.
By using these views when creating a building digitally, the vision for the building is imparted directly to the project players. Thanks to 3D modelling, project planning is simplified and the projected views are automatically created.
Therefore, while the 3D view is important, the use of the 2D details view must also be used. The two complementary representations must be separate, which will allow you to optimise your model, and manage the representation of the element with its varying levels of detail.
- Are you familiar with the product data template?
The Product data template corresponds to the list of properties per category of objects. This is a model that enables the simpler generation of a set of information on the product, for a given object, within a given category. According to the Chartered Institution Of Building Services Engineers (CIBSE), this process allows you to produce a product data sheet, which can be made available to any project player by the manufacturer.
In other words, these are templates that provide a framework with which to model them. At present there are still no standards when it comes to creating a 3D object. However, it is essential that you have a framework to which you can refer, and to ensure that models are drawn up in the same way, so that there is no loss of information when switching between software applications. Therefore, we recommend the use of the product data template so that all players within the same project or company can base their work on this shared definition. A PDT for a given product category is an electronic calculation sheet that contains a set of parameters – fields. These parameters cover all of the information provided by a product. Check out PDT examples from CIBSE here!
- Go further, by defining property sets for each project phase
For more advanced users, it is also possible to define property sets for each project phase. The property set is what enables the definition of the context of a BIM object (its name, where it is located, its zone, its dimensions). To find out more about property sets, check out our dedicated webinar. You will learn how to filter the data embedded in each BIM object in your library based on the general profile of the user who will be using the data (i.e. engineer, designer, architect, etc).
And after the definition of the property sets, it’s time to maintain them.
Nowadays those who are aware of the importance of this work to maintain property sets, and in particular to support their teams in the use of these aligned and up-to-date parameters, are a rare breed. In order to address this issue, Onfly allows you to facilitate their maintenance, but also to automate updates within the settings used by employees.
Damien, BIM adviser to a dozen designers for a fluid design office, attests: “Before, when I was adding a parameter to my company’s standard, I had to open each family one after the other in order to add it. On average, for an object, this took me a little over 3 minutes: the time to open it, to access the new file, and add it to the object, correctly configured and in the right place. And this for every object within a category.
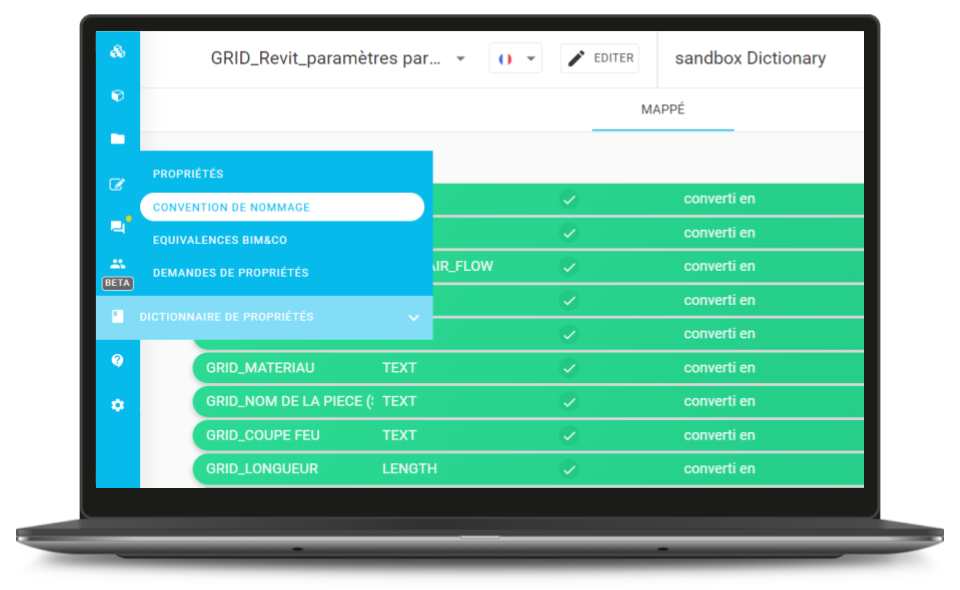
- Adopting a shared language with the naming convention
Creating a naming convention means assigning a coherent and easily recognisable name to a BIM object, in order that it can be more easily identified during your projects.
Without the naming convention, the existing denominations of BIM objects vary depending on the user, but also depending on their language. This also requires time-consuming manual work, and can result in more errors. It is therefore important to name your objects in order to better organise yourself and to save time when searching for a specific object.
According to Rémy Maurcot, BIM Product Manager at BIM&CO, “The naming convention is part of a process of exchange between companies, and allows us to ensure that a given property will be named in the same way. It allows us to have a shared language, in order to find information”.
In order to have this convention applied and to facilitate the achievement of BIM objectives, the Onfly solution thus enables the definition of rules for the naming of the parameters downstream from the project, thus enabling each player to conform to these rules without even knowing it. This is a solution that suits both BIM managers, who request that each individual respect the rules defines in the BIM convention, and designers, who occasionally find it difficult to respect these rules on account of other constraints associated with the project in question.
- Editing your BIM objects with a view to optimising them
With the Onfly object editor, you can define every aspect of the necessary BIM objects. While the geometric models are important, the data elements are even more so. This is why we have established 7 consecutive steps in order to create an optimal BIM object:
- Info : Enter the basic information for the BIM object.
- Photos : Add images depicting the object.
- Tags & Classifications : Assign the object to classes and tags. While classifying an object is not mandatory, it nonetheless allows members who use objects to search for objects on the platform more effectively.
- Properties : Add and enhance properties.
- Models : Add 3D models.
- Object documents : Incorporate documents or external links.
- Publication : Create the object in question.


As for Éric Pruvost, Director of the BIM Transformation Plan at SYSTRA, 
You now know all there is to know about the optimisation of your BIM objects! Therefore, to take things to the next level, check out our next webinar on object centralisation on the 22nd of June.
See you soon!